|
TransLoad 1224-30 fully adjustable charge controller for 12 or 24 volt systems $125.00
Available in limited
quantities
Click image for larger view. |
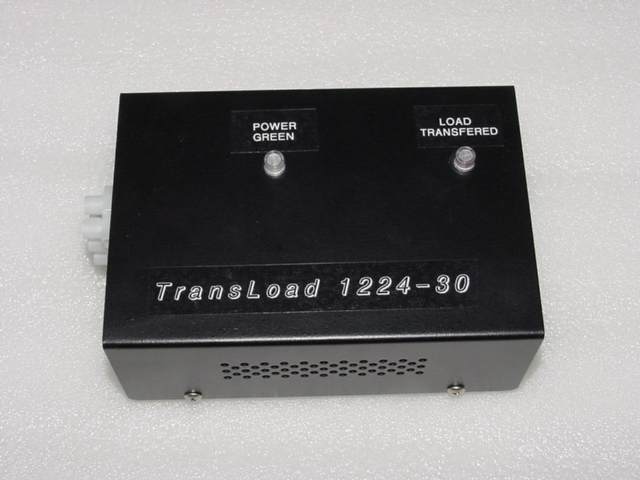
Overview of the TransLoad 1224-30 Charge Controller
TLG Windpower Products in close cooperation with Blue Ridge Controllers proudly releases the TransLoad 1224-30 charge controller for your 12 or 24 volt battery bank needs.
The 1224-30 is selectable by an
internal jumper for either 12 or 24 volt systems, and offers a full
range of high and low limit adjustments for any type of battery you may
have.
With a volt meter you simply set the high limit pot to the maximum
amount of voltage you want to run your bank at, then set the low limit
pot to the lowest voltage that you want your battery bank to drop to.
The amount of load you place on the controller will define the rate of
discharge. some people like to put smaller loads on there bank to allow
for slow discharge while some people in high wind areas need to dump off
the excess power at a faster rate.
The TransLoad 1224-30 controller has
a voltage stabilizer circuit to provide rock solid limits on both the
high and low set points.
The controller can handle up to 30 amps direct loading, if more load is
desired you can add (external relays) to run loads up to whatever
amperage you want making the TransLoad 1224-30 a very versatile charge
controller.
Features:
Selectable 12 or 24 volt ranges.
Fully adjustable low and high limit cutoff points.
Voltage stabilizer circuit to maintain setting in varying temperature
ranges.
Dampened electronic switching providing (electrically silent) switching
between dump and bank.
Load transfer light to show that the batteries are full and the dump
load is engaged.
Reverse polarity protection with indicator light to protect against
hooking the wires up wrong.
Easy 3 wire hookup VIA buss bar.
Metal case to insure circuitry protection and cooling of internal
regulators.
Note:
It is recommended that you follow the battery manufactures suggestion
for high and low limit ranges. Failure to follow their recommendations
may result in premature battery failure.
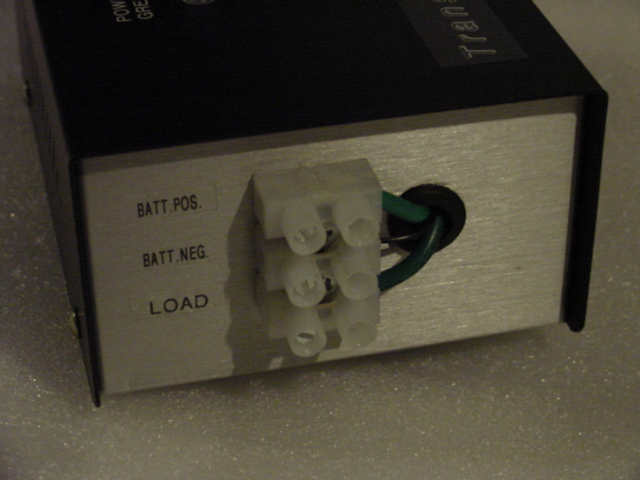
Installation and adjusting of the switch points
There are 3 contacts on the buss bar
located on the end of the controller.
Batt Poss, Batt Neg, and Load
Connect the Batt Poss to the Positive post of your battery bank.
Connect the Batt Neg to the Negative post of your battery bank.
Connect the LOAD to the positive connection of your dump load devise.
You will connect the negative (from your dump load devise)
back to the negative contact of your battery bank to complete the dump
circuit.
In the image below you can see the
12/24 jumper that allow the end user to set the controller for use on a
12 or 24 volt bank.
The is a small set of pins on the controllers motherboard. If you have
the contact bar contacting the center pin to the 12 pin your controller
is set to the 12-volt range. Likewise if you have the contact bar on
the center pin to the 24-volt pin your controller will be set for use on
a 24 volt bank.
To adjust the controllers high limit
cut out and low limit cut in is simple as well.
There are to small square shaped pots on the motherboard.
The left pot it the low limit cut in adjustment.
The right pot is your high limit cut out adjustment.
Both pots are calibrated to some basic set points and you can adjust
your controller fairly close without a meter by pointing the adjuster on
the pot to the indicated voltage on the motherboard.
There are two different ranges printed around the pots and are
respective to the 12/24 volt selected by the 3 pin jumper.
Custom cut in and out points
To precision adjust the set points gently turn the high limit pot all
the way to the right / Clockwise until is stops.
Then gently turn the low limit pot all way to the left \
Counterclockwise until it stops.
With a meter on the battery banks positive and negative connections
monitor the battery voltage until it reaches the highest point desired.
Then slowly and gently turn the high pot Counterclockwise/left until the
diversion light comes on.
Now monitor your battery banks voltage as it drains into your dump load
devise, once it reaches the lowest point desired then slowly and gently
turn the low limit pop Clockwise/right until the diversion light goes
out.
Your controller is now adjusted to your custom set points.
Click to view the image below to
see the set points discussed above

Please read the Product Disclaimer before you buy.